|
|
|
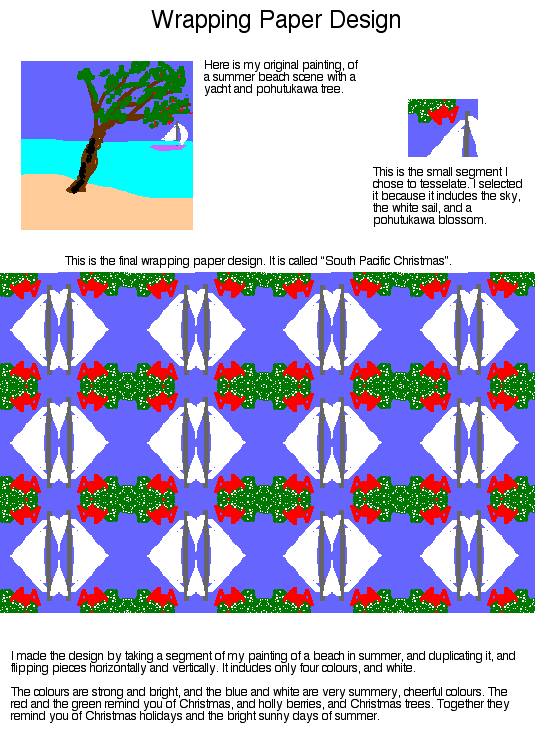
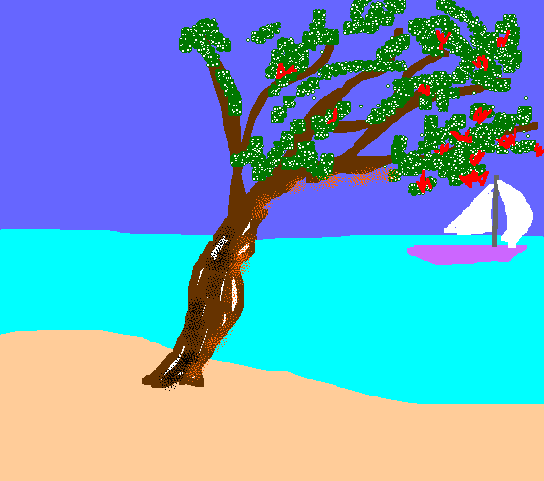
1. Your first task is to paint a picture in KidPix. It should be a quick picture, and not use any stamps. You will get interesting effects in your final paper if you use some paint brush tools as part of the painting.
Now you should save your picture (because you could make lots of different designs of wrapping paper from this one painting). Then go apple - A to select the whole picture (which will have marching ants around it), and then apple - C to copy the picture. Or you can click on the truck tool, and use the tool along the bottom bar that is on the right - a square with a magnet in it - to select the whole picture. .......................
2. Now open an AppleWorks Draw document, and save it - this will be your actual design page. First of all, you need to make a text box to go across the top with the heading "Wrapping Paper Design", and say who it was by. If you can't remember how to make a text box, check here.
3. On the appleworks page, paste your picture by going apple - V. If this doesn't paste it in, maybe you forgot to copy it from KidPix - go back and copy it again.
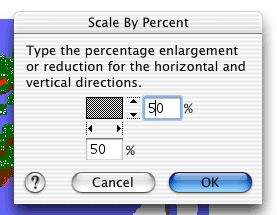
Now go Arrange - Scale by percent in the menu bar. You should have each box saying 50%, and this will make the picture small enough to fit in one corner of your page, under the heading.
4. Now you are ready to select your tile. Go back to KidPix, and your big painting. Select one small square from the painting that does not have any recognisable object in it. For example, making a square round the small sailing boat in this example would give a really boring result. You want a square that doesn't look like anything at all, like this one.

Now, use the tool along the bottom bar with a square and a magnet inside it. Draw your square, and then go apple - C to copy it. Go back to your AppleWorks page, and apple - V to paste your square in.
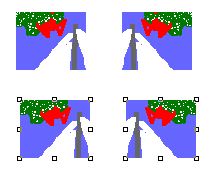
5. Now you are ready to start tiling. Make a copy of the small square by going apple - D to duplicate it (that means make an exact copy of it). Move the copy down and to the left. Now duplicate it a second time, so you have two small tiles next to each other.
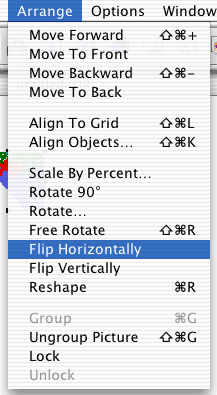
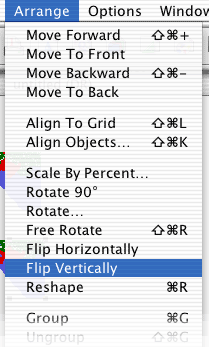
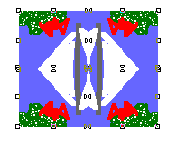
6. While the second square still has handles on it, go Arrange - Flip horizontally in the menu bar. This will flip the second square over. Then hold down the shift key, and select both of the squares, and go apple - D again. This will give you four squares. Move them until they look like the example below, and then while the bottom two still have handles, flip them vertically.
 .......
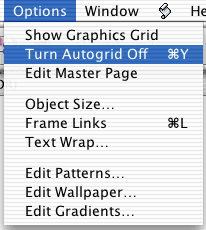
7. Now you should turn off the autogrid, so that you can use the arrow keys to move the four tiles until they touch, with no gaps between. Go Options - Turn Autogrid Off in the menu bar. Then nudge the four tiles until they make a neat square.
 ........................
When you have done that, draw an imaginary box right around the four tiles (bigger than they are) so that it selects all four of them, and they all have handles. When you have done this, group the four together by going Arrange - Group in the menu bar.
(Remember you can always go Arrange - Ungroup if you change your mind later and need to fix up the group.)
8. Now you should duplicate this square by going apple - D. Move the second square along so it lines up neatly with the first one (no gaps) and then keep going apple - D until you have a line across the page like this.
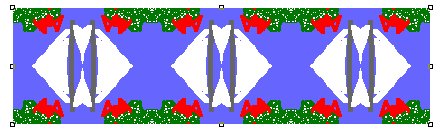
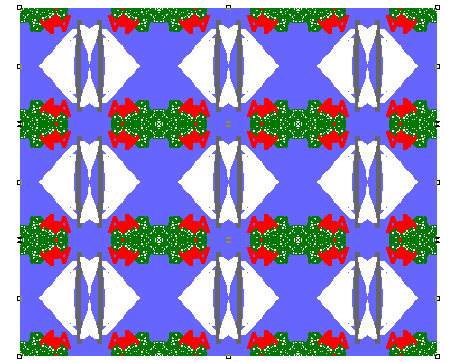
Then you draw an imaginary box around the outside of this line, and select all the squares in it, and go apple - G to group it. Now you can duplicate this line, and move it down, then keep going until you have the whole sheet of wrapping paper like this one below.
Now you can work at the fine-tuning of your page, moving objects about, and lining up your columns of text so they are level, and an even width. This last fiddly work is what makes the difference between an ordinary looking newspaper page, and an excellent one, the kind that wins $5,000 in competitions! How high are your standards?
9. You have now finished your design, and you need to give it a name. You should use text boxes to explain your first KidPix picture, why you chose your tile, to name your wrapping paper, and finally to explain what it is suitable for wrapping up. Here is the completed design paper.