Go
Back Go
Back |
|
Turn sideways || Page View || Reduce size || Document options || Slideshow options || Text boxes || Images || Copying for speed || Run it || Adding sound
|
Go
Back |
|
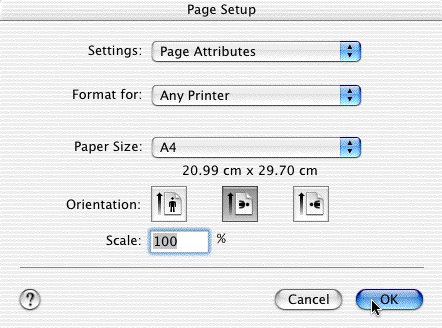
Open an AppleWorks draw document, and turn the page to sideways by going File - Page Setup... and selecting the landscape layout. (red circle)
Go Window - Page View to give a pale grey line around the outside of the page.
3. Reduce the size of the pages
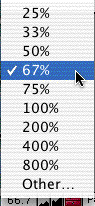
Now in the bottom left corner of the window, click and hold on the 100 to select 67% - this will make the page seem smaller while you work on it, and you will be able to see the whole page without scrolling.
Go Format - Document and set up the options below. Enter 0 for the first four boxes showing the margins, and then in the Pages Down section put as many pages as you will want in the slideshow. (You can always come back to this part if you want to add more later, or take some away.)
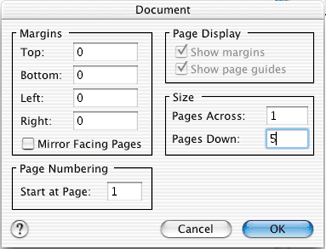
Click OK when you have finished setting this window up.
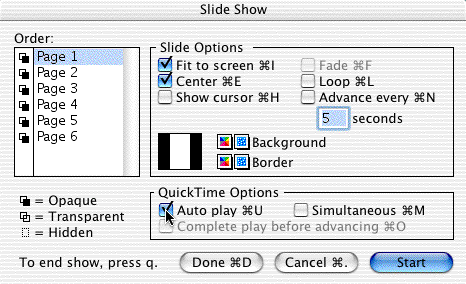
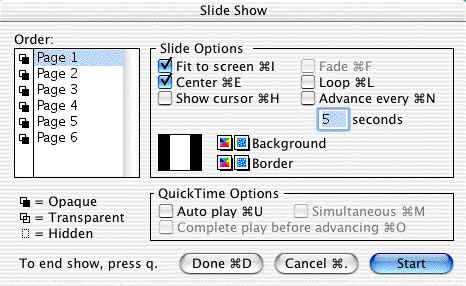
In the menu bar go Window - Slideshow .. to get the slideshow options window. You should have Fit to screen ticked, and Centre, but leave the others unticked.
To select your background choose a colour from the colour box for Background. DO NOT use a border colour - it will cause you problems later on. If you will be using dark text, use a light background. If you will be using light text, use a dark background.
Go Done when you have finished.
To put text in your slideshow, go to the second page (you should leave your first page blank so that it can sit on the computer waiting to start when you display it). Click ion the A in the toolbox so that you are using the text tool.

Now just drag your cursor across the page and it will make a text box to start typing the title of your slideshow in.

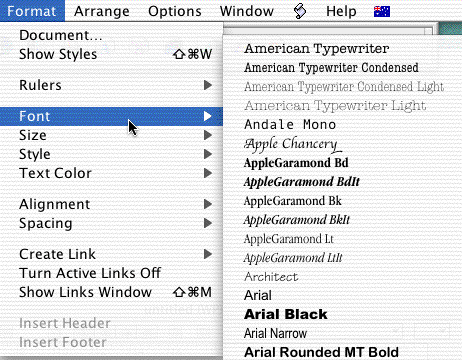
You probably need to make the size bigger so that you can read it. When you have finished typing, just click out of the box to get rid of the grey line and give the words four handles. You can now go Format from the menu bar, and change the font, the size and the colour and alignment. (Keep in mind it must show up against the background you have chosen!) You can also move your text box around the screen.
 ......

7. Putting images in your slideshow
You can put in images from the clippings file (File - Show Clippings) - check the instructions on putting in images if you are unsure of how to do this.
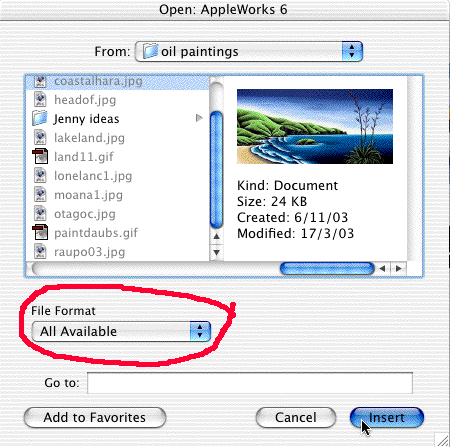
You can also put in any pictures you have scanned or drawn yourself in KidPix or in Dabbler. Do this by going File - Insert and then navigating to the picture you want to use. Remember to choose All Available not just AppleWorks on that window!
You will probably have to move and resize it when you have put it in. Remember - move from the middle, and resize from a corner. Remember - if the image is not from the clippings file, or your own art work, you must acknowledge the source in a bibliography. (Remember this when you are scanning pictures).

When you have set up your title page, you will now be doing a series of pages. They should have text boxes using the same size, colour and font, and the fastest way to do this, is to select the first text box when you have finished it, (click on it once so it has four handles), copy it (Edit - Copy), and then paste it (Edit - Paste) on the next page. Now just click on it four times to select the whole thing, and type over it! That way all your pages will look consistent.

You need to check out how it looks after you have done the first page. Go Window - Slideshow.. and then click Start. Click the mouse to advance from page to page, and when you have seen enough, press Q on the keyboard, and then Done on screen. Check that the font is clear enough (it should be a sans serif font, remember), and can be seen against the background. Now is the time to make changes - not after you have done all the pages!

10. Adding sound to the title page
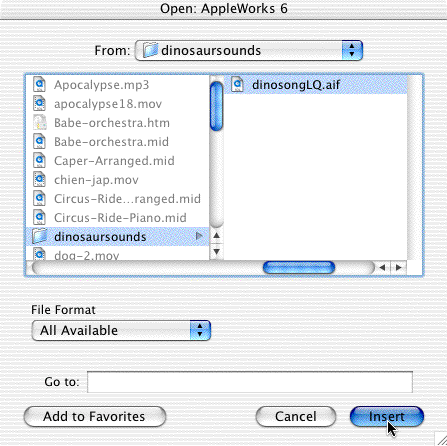
You may want to add a bit of music to your title page. Do this by going to that page, and then going File - Insert and navigating to the Student Disk folder Sounds to Use. Select the sound or music (keep it short!), make sure you have chosen All Available instead of just AppleWorks, and click Insert.
You will now see a little movie icon on the middle of the title page. You don't see it when the slideshow starts, it just plays that sound movie.
You must now tell the slideshow to play the movie. Go Window - Slideshow.. and then in the dialogue box, select Auto play. (If you have set the slideshow to advance every so many seconds, you will also need to select Complete play before advancing). Now start your slideshow!