The Tool Picker.
ArtRage 2.0 has a range of tools that you can use for painting, which can be selected from the Tool Picker. This section looks at each of them and the settings they have.
Selecting Tools.
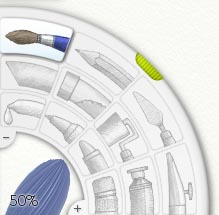
The Tool Picker at the bottom left of the Canvas allows you to select the tool you wish to use for painting on your canvas. The Tool Picker has a button for each of the tools, and a Tool Size control that lets you change how large the tool is.
To select a tool, click its button in the Tool Picker. The tools in the picker appear as follows, from the outer row to the inner row, left to right.
Setting Tool Size.
To set the size of a tool, click and drag in the Tool Size control which is at the bottom left corner of the Tool Picker.

Drag to the right to make the tool larger, or the left to make it smaller. If you wish, you can also use the + and - buttons at its edge to fine tune the size. If you wish to enter a value directly, click the size preview and a text entry box will appear allowing you to enter the precise size you wish.
Some General Rules for Paint.
ArtRage attempts to simulate real world painting, and so there are some general rules that apply to the paint you use on your canvas.
Smearing.
You can only smear when there is paint to smear. Imagine putting a really thick stripe of toothpaste on a canvas. When it’s thick you can spread it a long way, and as you spread it it gets thinner until eventually you can’t spread it any further. ArtRage works the same way.

If you have a lot of paint on your canvas (the Oil Brush and Paint Tube are good for leaving lots of paint on the cavas) you can smear it a long way. The Oil Brush will smear paint as it is used, so will the Palette Knife. As you smear you’ll see that the paint thins out and eventually runs out on the canvas. When it’s run out, it’s too thin to smear again so you should add more paint.
If you try to smear where there’s nothing to smear, such as over a chalk stroke, you’ll get a smudging effect instead.

Wetness.
ArtRage lets you apply wet pens to your canvas. The wetter the pen, the more ink is applied and the more color it will pick up as you stroke.
If you use really wet pens you can see that the ink color changes because it’s wetting the color beneath and carrying it with the stroke.
Dryness.
Sometimes you’ll want to paint on to paint that has already dried. Doing this means that the paint you apply won’t smear or blend with the paint beneath, it’s dry so there’s nothing to blend with. The easiest way to do this is to add a new Layer and paint on that instead. That means that you won’t mix with the paint below at all, and you can still go back to the earlier layer and paint in it if you wish to (it’s like painting on transparent plastic in front of your canvas, you can always go back to the layer beneath if you want to change it).
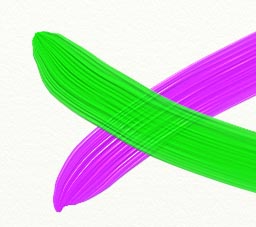
You’ll notice that if you paint on a new Layer the lumpiness of the paint you applied beneath is still visible. The stroke we painted across the top here hasn’t blended at all but you can see the texture of the stroke below because it’s just like you’re painting over it on a real canvas.
Tip: The Oil Brush as an Insta-Dry option that will make every stroke of paint dry as you apply it so you don’t need to add another layer.
The Oil Brush Tool.
The Oil Brush tool gives you a paint brush that can be used to paint with a variety of different styles of oil. With the new Thinners setting you can adjust how lumpy the oil paint is and get a range of results from thick, dry paint to thin, easy to spread paint. If you’re just playing around with paint for the first time, try some nice thick oils and see how they smear!
The Oil Brush has the following properties:
When you select the Oil Brush, the following settings become available:
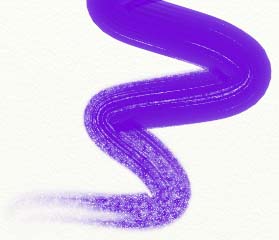
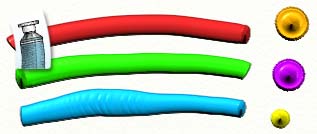
Thinners let you create a variety of different types of oil paint.

The top stroke has no thinners, the middle stroke has 50% and the bottom has 100%. Notice that the bristles leave less of a pattern as we add more thinners, the paint gets wetter. If you use the Palette knife on the top stroke you can smear quite a long way because there’s a lot of paint there. If you use it on the bottom stroke you can’t smear very far at all, the paint is too thin.
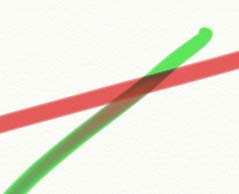
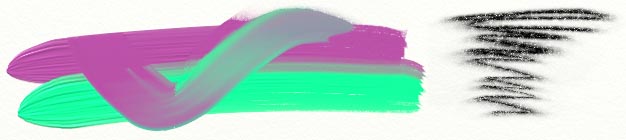
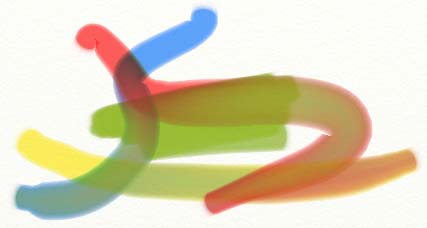
Paint will smear itself and blend colors as you use it. In the image below we crossed two strokes of thick paint (0% Thinners) to show this.
The Pencil Tool.
The Pencil Tool gives you a range of pencils that you can draw with. By adjusting its settings you can make it hard or soft, and even change the angle at which you’re holding it. The pencil is good for precision drawing, outlining, or even light shading as it uses the pressure value of your stylus to great effect if you have one.
The Pencil Tool has the following properties:
When you select the Pencil, the following settings become available:
Changing the softness of the Pencil gives you a variety of different pencil types. A hard pencil such as a 6H would have a softness around 0%. A soft pencil such as a 6B would have a softness around 100%.
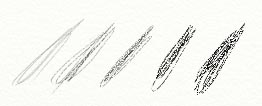
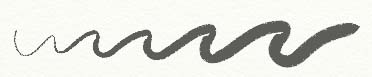
If you want to do soft shading with the pencil, take the Tilt Angle value up. The higher this value, the ‘flatter’ the area being used to draw with so you get a much softer result.
That stroke was produced with a pencil with a Tilt Angle of 100%, used lightly and ‘scrubbed’ back and forth repeatedly to slowly build up shade.
The Palette Knife Tool.
The Palette Knife Tool gives you a flat bladed knife that can be used for smearing paint around, or smudging color when you don’t have much to smear. If you have lumpy strokes that you want to smooth, or even if you just want to blend some colors together, use the Palette Knife. If you’re just learning about paint, try using the Paint Tube tool to lay down two thick strokes of different color, and then using the Palette Knife to smear them together to mix. The Palette Knife can be a great tool for creating textures in your paint.
When you select the Palette Knife, the following settings become available:
The Palette Knife lets you smear paint and smudge other types of media. When there’s something to smear, it smears it. When there’s nothing to smear but something to smudge, it smudges it. The difference is in the type of thing you’re using the knife on. If you’ve used the Tube to lay down a long stripe of paint, the knife has lots to smear so you can smear it around. If you’ve done some pencil sketching, the knife can’t smear anything but it can smudge the pencil lines.
Tip: Some tools in ArtRage (such as the Glitter Tool) apply dry paint that can’t be smeared. However, if you add a tiny bit of wet paint next to a dry stroke, and use the knife to smear the wet paint over the dry, the two blend and you can start to smear the dry as well. This can create some great textures.
The Airbrush Tool.
The Airbrush Tool gives you a fine nozzled spray tool that can be used to apply thin coats of paint to your canvas. Like a real airbrush, this tool seems simple at first but can be used to create a huge range of effects. By changing how fast the spray flows, the angle it sprays at, and even a tapering effect, you can produce all sorts of interesting results. The Airbrush Tool is particularly good at applying consistent strokes of thin paint without smearing, smudging, or altering the paint it is applied over in any way but color. So, if you ever want to change the color of something you’ve applied, this is the tool to use.
The airbrush has the following properties:
When you select the Airbrush, the following settings become available:
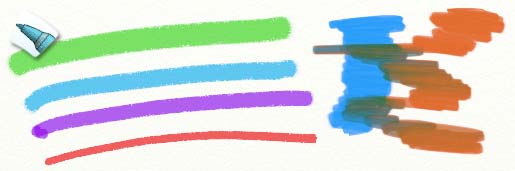
The Airbrush can produce some complex results with its settings, here are some tips on how to use it.
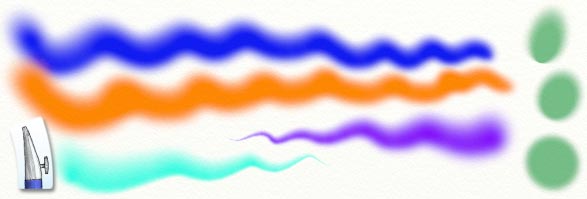
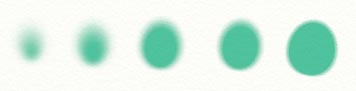
Tilt Angle is great for creating nice shaped strokes. In the image below, the leftmost spot was made with a mouse and 0% tilt, as the spots progress to the right, the tilt level was increased. By the time we get to the far right, the spot is more oval than circular, and extends further away from the centre point.
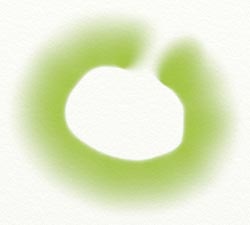
When you’re using the mouse, the direction of tilt is defined by how you move. In the image below I dragged in an counterclockwise circle, notice how the centre of the circle has a well defined line, while the outside is fuzzy, that shows that the Airbrush was tilting away from the centre as I moved.
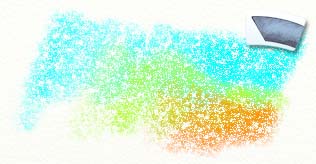
Taper Length is used to create ‘knife strokes’ that get thinner over time. The Taper Length value set to 0% or 100% causes no taper, but anywhere in between makes the stroke trail off. The stroke won’t taper unless you’re moving, so even if you hold the Airbrush on the same spot with Autoflow on for a while, it won’t start tapering until you move. In the image below, the top stroke has no taper, and we increased it with each stroke down.

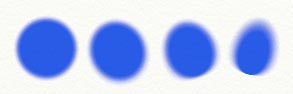
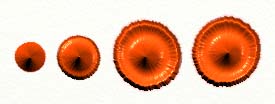
Autoflow can be used to create dark spots of color with harder edges. In the image below, Autoflow is on and with each spot progressing to the right we held the cursor still for longer. The Pressure was set quite low to slow the flow down and make it more obvious what the effect was. If you have high pressure, holding for even a short time with Autoflow On will create hard edges.
Notice how the spots get larger as they go to the right? The brush size was the same for all of them, but as more paint is applied the dark area in the middle gets bigger.
Tip: If you have lumpy paint on your canvas and you want to change its color, use the Airbrush, it applies color without changing any of the volume of paint on the canvas. If you want to make a surface Metallic, turn on the Metallic paint option and use the Airbrush, it applies a nice smooth coat to things.
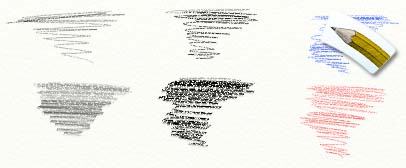
The Chalk Tool.
The Chalk Tool gives you a stick of chalk for use on your canvas. This tool is a simple tool, but it can create some subtle effects if you use it lightly on a rough surface. If you want to bring out the texture of the paper you’re using, this is a great tool for the job.
The Chalk Tool has the following properties:
When you select the Chalk Tool, the following settings become available:
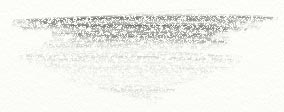
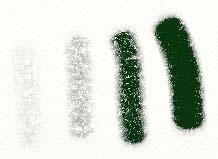
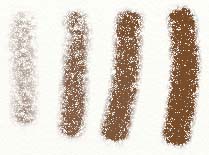
Pressing harder with the Chalk Tool, or increasing its pressure, makes more of it apply to the canvas. In the image below, we started with light strokes and moved on to heavier as we applied more.
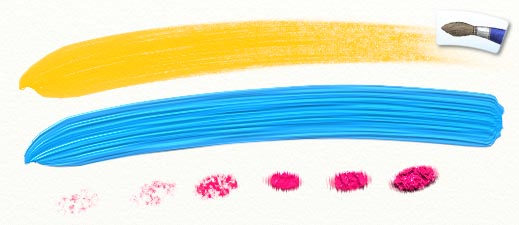
The Glitter Tool.
The Glitter Tool gives you a tube of glitter that can be sprinkled on to the canvas. This takes the form of sparkly dust that gathers to create a trail along the path of your mouse or stylus. You can sprinkle it quickly or slowly, and let it build up in to big piles if you like. Glitter works particularly well if you turn on the ‘Metallic’ check box in the Color Picker so that it applies metal dust. If you don’t use Metallic with glitter, you can get some good grainy results. Glitter’s great for people who want to play around with the kind of pictures most of us used to do at school, but it can also be used to create some rather nice textures.
Glitter has the following properties:
When you select the Glitter Tool, the following settings become available:
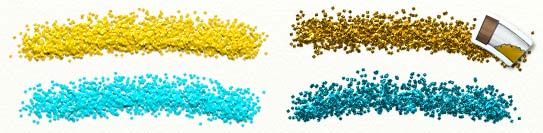
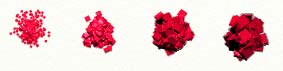
The Glitter Tool can be used for a wide range of effects. It can be used to create some simple images with a bit of sparkle, but it can also be used to add texture to your paintings. Turning off the Metallic checkbox in the Color Picker when using Glitter gives you a result that looks more like grainy paint. The effect can be adjusted by changing the Glitter Size dial.
The Paint Roller Tool.
The Paint Roller Tool gives you a hard surfaced roller that can be used for applying large, smooth strokes of paint to your canvas. If you want to quickly block in a large area with color, or even just apply a flat stroke of paint without any bristle texturing, this is the tool to use!
The Paint Roller has the following properties:
When you select the Paint Roller Tool, the following settings become available:
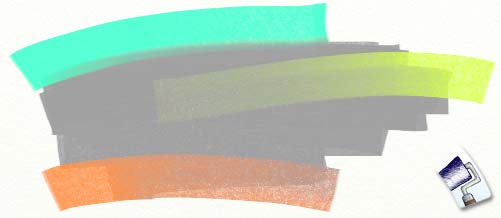
If your tablet supports pressure, remember that the paint roller leaves the best strokes if you don’t press too hard. The harder you press, the more the paint is squeezed out of the way by the roller head, so you get a mottled look to your stroke.
Tip: Because of the way it works with pressure, the Paint Roller can be used to remove paint from the Canvas. Just press really hard as you use it and you’ll see it picks up paint from below where it can.
The Paint Tube Tool.
The Paint Tube Tool gives you a big tube of paint that can be squeezed out on to your canvas to create some really thick strokes. The Paint tube isn’t necessarily a tool for applying strokes, it’s more a way to get lots of paint on to the canvas rapidly so that you can blend it with other paint or create textures using the Palette Knife. It’s also great fun. If you just click to apply a spot of paint rather than a stroke, you can get some interesting textures too.
Strokes made by the Paint Tube have the following properties:
When you select the Paint Tube tool, the following settings become available:
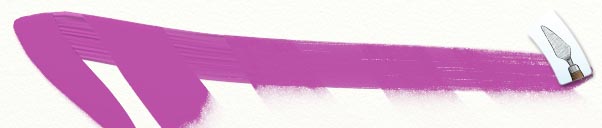
The Paint Tube is a simple tool, and much of the time it will be used only to prepare paint for later use. If you try applying it in spots, by single clicking, you can get some interesting textures. Pressure changes the look of the single spot as you apply it.
The leftmost spot is with very light pressure, the rightmost is with heavy pressure. The mouth of the tube has dipped in to the paint as I press harder and created a ring in the spot.
The Sampler Tool.

The Sampler Tool does not create paint strokes, rather it is used to choose colors by sampling them from your canvas. When you select the tool you can then click and drag over your canvas to sample colors from wherever you like. The Color Picker updates while you are sampling, to show you the result.
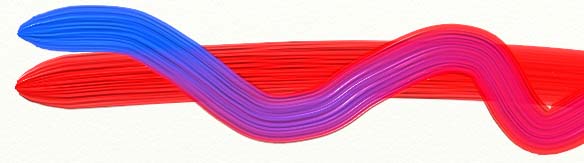
The Felt Pen Tool.
The Felt Pen Tool gives you a variety of felt tipped pens to use on your canvas. By changing its settings you can create firm tips, soft tips, wet or dry tips, and any combination of those. Felt Pens can be used for precision work, particularly if they are wet tipped because they tend to sink in to the dents of the canvas more. They can also be used for rough highlighting when dry.
The Felt Pen Tool has the following properties:
When you select the Felt Pen, the following settings become available:
Having a soft tipped pen can allow for a lot of control over the shape of your stroke.
Having a wet tipped pen creates some smooth blending results if you use it on top of other strokes.
If you set your wet pen to draw with white as its color, you won’t see it apply anything (white’s transparent in a felt tip), but you will see it draw other colors out as it goes, almost like a water pen.
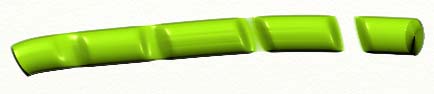
The Crayon Tool.
The Crayon Tool gives you a stick of wax crayon to use on your canvas. Like the Chalk Tool, this tool can be used to bring out the texture of the paper but it also smears slightly due to the wax it applies. Soft crayons create a more lumpy look, while hard crayons create a softer result more like chalk. The Crayon’s a nice and simple tool for creating colored lines.
The Crayon Tool has the following properties:
When you select the Crayon Tool, the following settings become available:
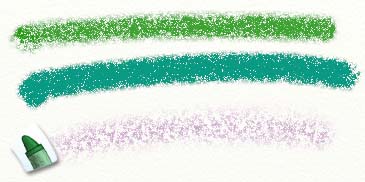
If you want a bold stroke, use a soft crayon as the wax will build up faster.
The strokes in the image above have low Softness at the left, and high Softness at the right. Notice that the softer strokes look denser and the color is more visible.
The Eraser Tool.
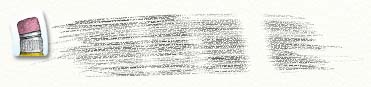
The Eraser Tool gives you an eraser that can be used to remove paint of all kinds from your canvas. Unlike a real eraser, this tool lets you remove oil paint as easily as you can remove pencil.
When you select the Eraser Tool, the following settings become available:
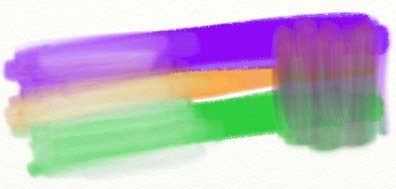
The Eraser Tool erases both the volume of paint from the canvas, and its color. As you start to erase, the eraser will remove the volume first.
In the image above, we ran an eraser once over a very lumpy patch of paint. Notice at the left that the color is still there, but the lump has been erased. If we continue to run the eraser back and forth, as we did in the right hand area, the color also vanishes.