The Basics.
What’s New in ArtRage 2.0
ArtRage 2.0 adds a large number of new features to the application. Here’s a quick list of the things you can expect to find:
The Interface.
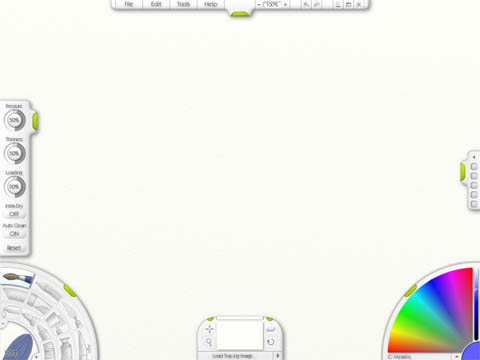
When you open ArtRage 2.0, you’ll get a window that looks something like this.
While you’re working in ArtRage, that window is both your easel and your tool box. It has number of handy controls that can be used while painting, and a canvas that fills the entire window.

At the top of the window is the menu bar. Here, you’ll find options for your painting, printing, saving, loading, and settings for your canvas. You’ll also find Undo and Redo, and controls for setting the size of the window.
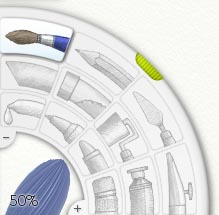
At the bottom left of the window is the tool picker. Here, you’ll be able to select which tool you’re using to paint with, and control how big it is.
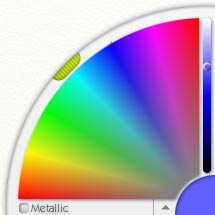
At the bottom right of the window is the color picker. Here, you’ll be able to select which color you’re painting with, and load in custom color pickers when you need them. If the tool you have selected can get dirty (like an oil brush), you’ll see a glass of water too, for cleaning it off.
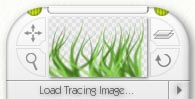
On the bottom edge of the window is the Canvas Panel. This panel gives you control over your canvas, letting you rotate it, zoom it, or move it around. It also lets you load a Tracing Image if you want to work from that, and gives you access to your Layers.
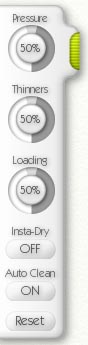
Stuck to the left edge of the window is the Tool Settings panel. When you have selected a tool in the Tool Picker, this is where you go to change any properties it may have, like how thin your paint is.
Stuck to the right edge of the window is the Color Samples panel. This panel lets you store colors so that you can get them back for use later on.
Other panels will appear as you’re using the application, they’re explained later on in the manual. If you just want to get in and paint immediately, all you need to be able to find are the Tool Picker and the Color Picker.
Interface Changes from ArtRage 1.
If you’ve used ArtRage 1, you’ll find most of the tools you remember in the same place they were before. However, there are some changes we’ve made that you may want to know about:
Using the Interface.
The ArtRage 2.0 interface has a variety of controls that perform common operations. This section takes a quick look at some of the shortcuts you can take when using them.
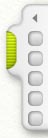
Grips and Movable Panels.

Any panel that has a grip can be retracted in to the side of the screen. Click the grip and the panel slides in. Click it again and the panel slides back out.
Panels that are on the edge of the screen (the Canvas Pane, Swatch Pane, Tool Settings Pane, and Menu Bar) can be dragged along their edge to move them. Click and drag the grip and you can reposition the pane.
Dials.

When you need to set a value in ArtRage you use a Dial. Dials let you click and drag in their circular area to set their value. The little grey wedge at the top is used if you want to set the value to 100% or 0% quickly, click in the right hand area of it to set the dial to 0%, or the left hand area to set it to 100%.
If you click in the central circular area of the dial (where the number is), you’ll get a text entry that lets you set the value numerically. Press OK to accept the change you’ve made, or Cancel to discard it.
If you click and drag up and down in the central circular area (where the number is), the value will change, this is for if you find it hard to drag in the circular region.
If you want to enter the value by hand, just click the central circular area (where the number is) without dragging, and a number entry box will pop up.
Tip: If you click and drag in the circular area of the dial, you can make the value adjustment more accurate by moving the mouse pointed away from the centre of the dial and dragging in a bigger circle.
Floating Color Pickers.
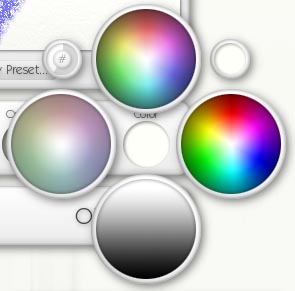
Some panels in ArtRage, such as the Paper Settings panel, let you select a color. Where you see a color sample you have two options:
In the top right of the Floating Color Picker is a small circle that contains the default color. Click in there, or drag to it and release the mouse over it, and the color will be selected.
In the top left of the Floating Color Picker is a small circle that contains a dial. Click in that, or drag to it and release the mouse over it, and a Numeric Color Picker will appear that lets you enter accurate color information.