
Creating, Saving, and Printing Paintings.
When you open up ArtRage you will already have a canvas as big as the screen ready for painting. You can create new paintings, save your paintings, or export them in a format that other packages can understand.
Creating a New Painting.
To create a new painting, select the New Painting option from the File Menu, or press N. When you do this, the New File panel appears.
This panel lets you set the size of your new painting, tell it to load a tracing paper if you wish, and set up the properties of the paper you’re going to be painting on.
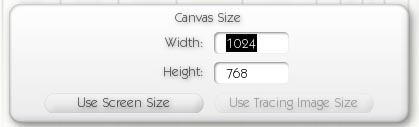
In the Canvas Size pane you can set the dimensions of your new canvas. Enter the size you wish to use in the text entry boxes.
If you wish to make a canvas as big as the screen (which is the default option), press the Use Screen Size button.
If you have told ArtRage you want to use a tracing paper in the image and you wish to use the size of that tracing paper, press the Use Tracing Paper Size button.

In the Tracing Paper pane you can tell ArtRage to load a tracing paper to use in the new painting. Click the Load Tracing Paper button to load a paper. If a paper is loaded, that button becomes a Clear Tracing Paper button to clear it.
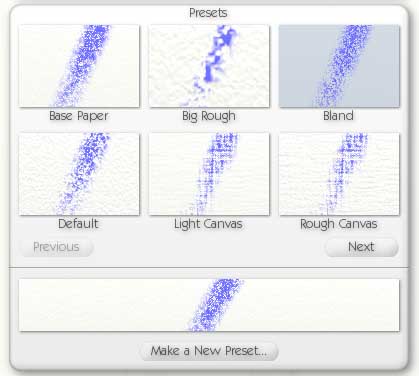
In the Presets pane you can select a preset canvas type to use for your painting. We’ve included a number of different canvas types (from real canvases, to paper types). To select one, click the image of the one you wish. If you click the Previous or Next buttons, you can browse through all of the presets you have.
When you select a canvas, a big preview of it is updated beneath the preset images. If you wish to add your current canvas settings as a new preset, click the Make a New Preset button and enter a name.

In the Settings pane you can set all of the properties of your new canvas.
The leftmost control is the Grain control. Click it to select a type of canvas grain to use, the Grain Picker will appear.
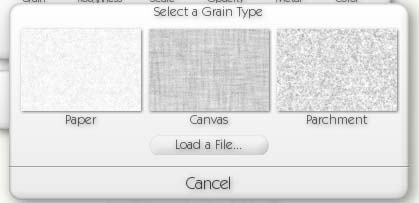
There are three standard Grains, which can be selected with a click, or you can load an image to use instead if you prefer. If you decide not to change the Grain, click Cancel in the Grain Picker.
The Roughness dial lets you change how rough your grain is, the higher the value the deeper the grain. The Scale dial lets you change how big the grain scale is, the higher the value the larger the size of the dents. The Opacity dial lets you change the opacity of your paper. The lower the value, the more transparent it becomes. The metal dial lets you control how metallic your paper is. The higher the value, the more metallic the paper looks.
The Color Sample at the far right lets you select a new color for your canvas. Click it to open a Floating Color Picker, or click and drag to select a color without having to click OK to accept.

Finally, click OK to create the new painting, or Cancel if you decide not to.
Saving or Exporting a Painting.
To save your painting, use the Save Painting option in the File Menu. When you save an ArtRage painting it is saved using the .ptg format, which contains all the information on the layers and paint that you have created so far.
If you wish to save your painting in a form that can be read by other applications, you can use the Export as Image option in the File Menu. That allows you to save your painting as a JPEG, PNG, BMP, or Photoshop format file. If you have used multiple layers, saving as any format except Photoshop will flatten your image down to one layer in the exported version. The painting in ArtRage will still have all its layers.
Tip: If you have created a painting with multiple layers, exporting as a Photoshop file keeps those layers intact. If you have created a painting that has a transparent bottom layer, saving as a PNG or Photoshop file will retain that transparency. Jpeg and BMP files fill in transparent areas with paper color and texture when you export.
Importing an Image.
If you have an image you would like to load in to ArtRage to work with, you can use the Import Image option in the File Menu. When you select this option you are given the opportunity to load in a Jpeg, BMP, PNG, or Photoshop document that will appear inside ArtRage.
When you import an image, the image is imported as if made out of Oils, so you can smear it using the Palette Knife or other tools that interact with wet paint.
Tip: If you import a multilayered Photoshop file, ArtRage keeps the layers intact. We support standard pixel layers in the Photoshop 5 format, which can be saved by all versions of Photoshop from 5 upwards. Special layers will be ignored on import.
Printing a Painting.
If you would like to print your image, select the Print option from the File Menu. On the PC, when you select this, a print window appears and from there you can start printing. On the Macintosh, to adjust your page settings, select the Page Settings option from the File Menu and change settings there before printing.