|
|
Make an anemometer |

![]()
|
|
Make an anemometer |
![]()
Materials
five paper cups
two straight plastic straws
a pin
scissors
paper hole punch
small stapler
sharp pencil with a rubber on the end
Procedure
Take four of the paper cups. Using the hole punch, punch one hole in each, about a centimetre below the rim.
Take the fifth cup. Punch four equally spaced holes about a half cm below the rim. Then punch a hole in the center of the bottom of the cup.
Take one of the four cups and push a straw through the hole. Fold the end of the straw, and staple it to the side of the cup across from the hole. Repeat this procedure for another one-hole cup and the second straw.
Now slide one cup and straw assembly through two opposite holes in the cup with four holes. Push another one-hole cup onto the end of the straw just pushed through the four-hole cup.
Bend the straw and staple it to the one-hole cup, making certain that the cup faces in the opposite direction from the first cup. Repeat this procedure using the other cup and straw assembly and the remaining one-hole cup.
Align the four cups so that their open ends face in the same direction (clockwise or counterclockwise) around the center cup. Push the straight pin through the two straws where they intersect. Push the eraser end of the pencil through the bottom hole in the center cup. Push the pin into the end of the pencil eraser as far as it will go. Your anemometer is ready to use.
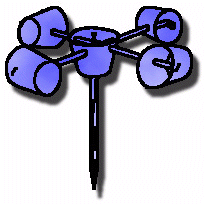
Your anemometer is useful because it rotates with the wind. It turns faster when the wind is stronger - and a properly made anemometer can actually measure wind speeds quite accurately.