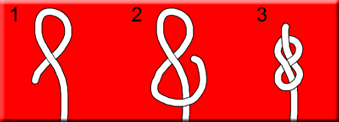
Figure 8 (Stopper)
- this is designed to mark a spot or keep the rope from slipping through a tight spot. This is very easy to untie after being tightened. No doubt, one of the more simple knots to tie. As shown in the picture, you just need to make it look like an 8.
Reef Knot (or Square Knot)
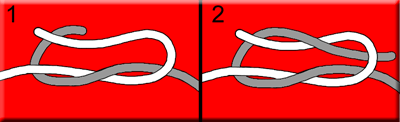
- used on board ships, not in very critical applications. At some point, it became known as a reliable knot. This KNOT is NOT that. It is said that this is the most overrated and INSECURE knot around. It easily unties itself with a couple of quick tugs or a bump. Now you probably already know how to tie this knot and this is what is most unsettling. It is included here for two reasons. First to warn you of the risks involved in using it; second, we only recommend using it in light weight applications like bundles or parcels.
Surgeon's Knot
- this is only a variation on the Square Knot and is good to use if you don't have someone around to hold down that knot to finish it off. As you can see, this will help hold the rope from slipping back after you tighten it.
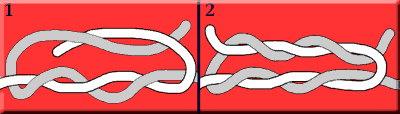
Fisherman's Knot

- as suggested, this is used very often to join two pieces of fishing line. This is only two Overhand Knots tied around each others rope to lock them.
Sheep Shank Knot

- this is made to take up slack in a rope. This knot will hold as long as there is constant strain on it. Make three loops and pull the inside loop out through the two other loops as shown. When worked together properly it will lock the rope and hold it until you shake it out when finished.