|

For
each Saturn model, you will need:

- One
unwanted compact disc (CD). (Many people get these free
in the mail.)
 One
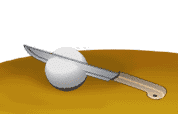
2-inch diameter styrofoam ball, carefully cut in half
with a sharp knife (get adult help, please!)
- White
glue
- Wooden
toothpicks
- Paint
brush, about 1/4 to 1/2 inch wide
- Glitter--silver,
gold, black or any other colors you want
- Yarn,
black or other colors (optional)
- Needle-nosed
pliers (or scissors will do)
- Small
paper clip
- Thread
What
to do:
Our
pictures are just suggestions. Decorate your Saturn and
rings however you want.
First,
start with the rings:

- The
CD will become Saturn's rings. Usually one side of the CD
has printing on it. This is the side you will decorate
with glitter.
- Try
not to get glitter in the center part of the CD, where
you will be gluing the styrofoam ball.
- Rinse
the paintbrush out between uses, so it will stay soft and
easy to use.
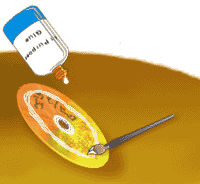
- Use
the paintbrush to carefully spread glue on the CD. If you
want to make it look like some of the rings are silver
and some gold, spread the glue only where you want to put
the first color, then sprinkle the glitter on the wet
glue. Let it dry completely. Then repeat for the
remaining areas. You can use as many different colors as
you want. Just be sure to let the glue dry completely for
each color before adding the next color.
- If
you want to use yarn also--for example, black to show the
divisions in the rings--glue it on and let it dry before
adding the glitter.
Then
decorate the planet:
- Stick
a toothpick into the flat side of each half of the
styrofoam ball to give yourself a handle.
- Use
the paintbrush to apply glue and glitter on the round
part of each half, as you did for the CD. Let the glue
dry completely.
Now
put them together:

- Take
the toothpick out of one of the styrofoam halves. On the
other half, make sure the toothpick is stuck exactly into
the center and push it in until it starts to poke out the
top.
- Spread
glue around the center of the decorated side of the CD.
Pick up the CD and place the styrofoam half with the
toothpick exactly in the center of the CD, toothpick
sticking through the hole.
- Now
push the other styrofoam half onto the toothpick sticking
out the hole on the other side of the CD. When both
halves are flat against the CD, a small part of the
toothpick will be sticking out one of Saturns "poles."
Break it off with needle-nosed pliers.
And
hang it up:
- Open
a small paper clip so it looks like this:

- Decide
which half of Saturn you want to be the top. Since
Saturn's axis is tilted 27 degrees, stick the paperclip
into the top about ½ inch away from the center
(where the toothpick comes through). Angle the paperclip
so it passes through the hole in the CD and helps hold
the two styrofoam halves together.
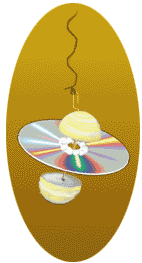
When
you hang your Saturn up, and it turns in the breeze, you
will see the "rings" from different angles, just as we
see the real Saturn at different angles from
Earth.
- Tie
any length of thread to the paperclip and hang your model
wherever you like.
Find
out more about Saturn's awesome rings!
|


