
|
|
The wrong way || The right way || Selecting part of image || Making a frame || Moving the picture || Making changes || Actions for the picture || Finding graphics to use || JPEGs and PICTs
|
|
|
1. It is NOT a good idea to just copy a picture (with Apple - C) and paste it (with Apple - V). If you do this, the picture is painted on the background. You can't delete it, or move it - you have to use the eraser to rub it out.
2. The best way to put an image in, is to add a graphic object. Do this by either going Objects - Add a Graphic Object, or by using the shortcut Apple - G.
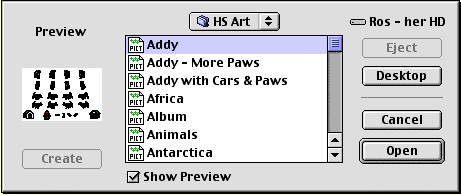 ........................
When you do this, you will get a window on your card, like the one above. The first place HyperStudio goes to find a picture is in the HS Art folder on the hard drive. Choose the picture you want, and click Open.
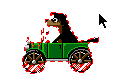
3. You will now see a window where you tell HyperStudio what part of the picture you want. You can select the area you want using the square box if you like, or draw around the picture freehand with the lasso tool. If the background is white, drawing round a shape with the lasso just chooses the coloured areas, like the image below.
Now click on OK at the bottom of the window.
4. This gives you a red dotted box on your card, and by clicking outside it, you get another window where you can make more choices. You can give the picture a frame of any colour, and any thickness if you want.
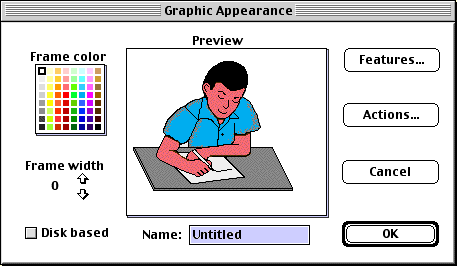
Choose the colour from Frame colour, and click on the arrows to make the frame wider or smaller. A frame width of 0 means there will be no frame around your picture. When you have made all the changes you want, click OK.
5. You can now move the picture around on the card and put it wherever you want. Make sure you are in the Edit tool (the arrow) to do this.
6. If you want to, you can go back to the picture again to make changes. Get into the Edit mode (by clicking the arrow in the toolbox), and double click on the picture to bring up the window you need.
You can stretch the corners of your image bigger or smaller, but be careful that you don't distort the picture. It is best not to change the size. Keep one finger on the Shift key while you drag a corner with the mouse to keep it in proportion.
7. If you want, you can make your picture have an action. In Edit, double click on the image to bring up the window, and then click the Actions button to get the following choices.
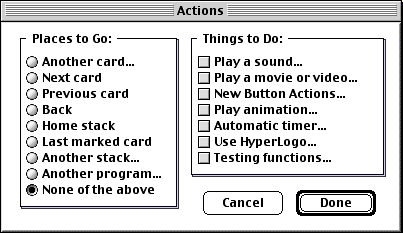
You could make the picture go to another card (see the button instructions for this), or you could get it to play a sound or a movie. If you want to do this, go to the making buttons page of instructions, and follow the same instructions as you would for making a button carry out an action.
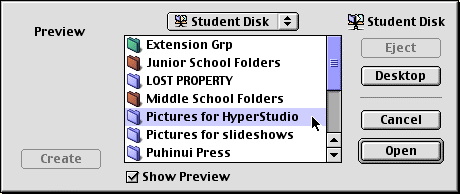
8. There are many different places you can get graphics from. All you need to do is to go Apple - G, and then navigate over the network to find the image you want. The example below is of someone who will get a picture from the Student Disk, Pictures for HyperStudio folder.
You can use pictures from:
The HS folder
Student Disk - Pictures for HyperStudio
KidPix pictures you have saved in your folder
AppleWorks pictures you have saved in your folder
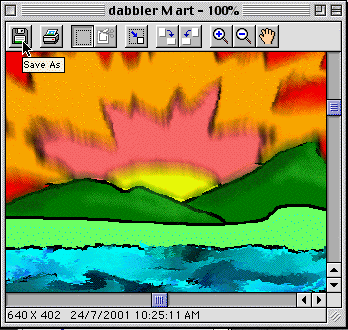
Art Dabbler pictures you have saved in your folder
The intranet (save the picture to disk in your folder
first).
9. HyperStudio prefers to work with pictures which are saved in the JPEG format, rather than PICTs. If you have a PICT file, and it won't work in HyperStudio, use ExifViewer to change the image to a JPEG.
First, navigate and find the image with ExifViewer, and double click to open it. Then go File - Save As, or click the picture of the disk in the top left corner.
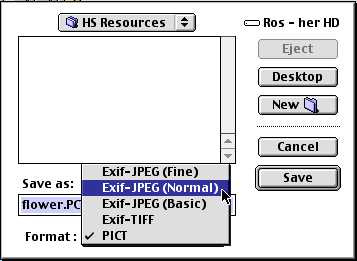
Now when you save it, make sure you save it as a JPEG - Normal will do.