 Go
Back Go
Back |
|
Button bar || Styles || Bigger tables || Keyboard shortcuts || Arrange || Text boxes || Duplicating || Painting || Autogrid
It is a good idea to learn what the different buttons along the button bar stand for - then you can be quick and efficient when you are working in AppleWorks.
To see what a button does, hold the cursor over it, and read what it says in the area circled in red. This tells you that pressing this button will give you a list of fonts to choose from. Remember that you need to select the piece of text that you want to change before using this button.

The next three letters stand for Bold, Italics and Underline, and are quick ways of modifying your text.
The buttons at the end are quick ways of opening a new word processing, spreadsheet, database, drawing or painting document.

The button ringed in red is a quick way of getting to the spellchecker.
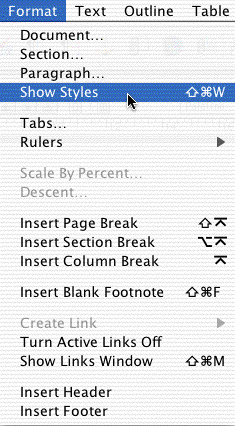
You can enter information into your document in different styles (such as bullet lists) by going Format - Show Styles. You can then select the style you want for the text you are about to write (or text which you have selected), by highlighting it, and then clicking Apply.
 ......
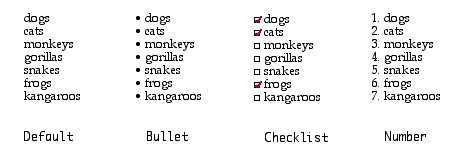
Here is a list shown in different styles. The good thing about a bullet list is that you can move items up and down the list just by dragging them. With the number list, you don't have to type the numbers in - they go in by themselves.
3. How to make bigger tables with the spreadsheet

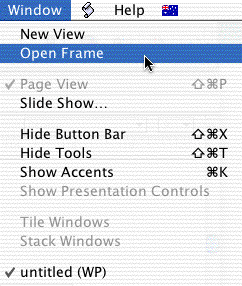
Sometimes when you are working on a spreadsheet you want more columns that you normally get across the page. When this happens, you need to click on the spreadsheet table, and go Window - Open Frame to get a spreadsheet page. Then you should go Format - Document to get the dialogue box below.
 .......
Where it says Size, just change the number of columns across to bigger than you need, go OK, and close that page. Now if you use the draw tool, and drag a corner of your spreadsheet table, it will add more columns.
4. Know your keyboard shortcuts
|
|
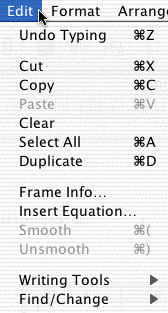
When you look at a menu from the menu bar, you can see the shortcuts that you can use. Let's look at the Edit commands. If you want to copy something, you highlight it, and hold down the apple key (that's what the twirly sign like a flower means) and then C. To paste it again, use Apple - V. (Don't use Apple - P because that is a shortcut for printing!) Don't ever use cut (Apple - X) unless you are quite sure, because it removes what you have selected completely. Knowing that you can undo the very last thing you did with Apple - Z can sometimes save you a lot of bother! Apple - A is a very useful command, because it tells you to choose everything. So is Apple - D, because it makes an exact copy of whatever you have selected. There are many other shortcuts - learn the ones of commands you use the most, and you will save lots of time! |
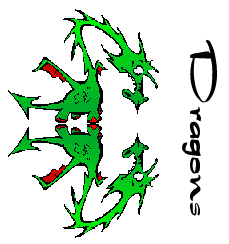
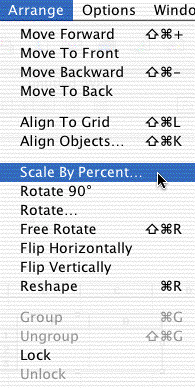
5. Arrange objects on your page
It is very useful to arrange images on your page. You can learn the basics from the image instructions page, but there are even more interesting things you can do with images.
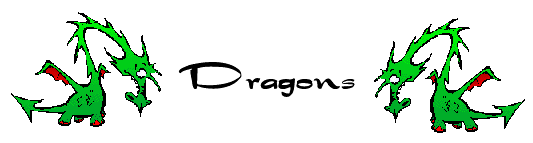
Take this heading. You insert an image of a dragon, and make it smaller. Then you duplicate it (Apple - D), and drag it to the other end of the heading. To make it face the other way, select it by clicking on it once, and go Arrange - Flip Horizontally - and it will turn around the other way.
You can also flip images vertically, or rotate them by any number of degrees between 1 and 360. Don't forget that you can do this with text boxes as well!
|
|
If you want to alter the size of an image and it needs to stay exact, you can select it (click on it), and then go Arrange - Scale by Percent, and make it either larger (by putting in numbers larger than 100) or smaller (by putting in numbers smaller than 100). You must be careful to put the same numbers in both boxes! 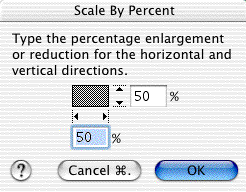 Another thing you can do is click Rotate.... This will let you turn an image by one corner, as far as you like. To get rid of the rotating, click on Rotate... again to unchoose it. |
Text boxes are very useful in both drawing and word processing documents. In a drawing page, just select the text tool (the A) and click and drag the cursor over the page to make a box to type in. Once you have put words in, you can move the box around. If you click out of it before typing in it, it will disappear.
If you are in a word processing page, you need to hold down the Option key while you click and drag the mouse. This will make a text box in just the same way as above.
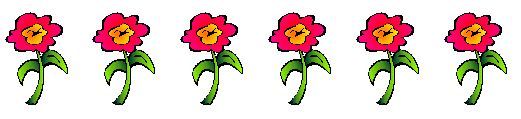
It is often very useful to use duplicate. If you have a small image, and you want a lot of them, perfectly spaced, you can select one, go Apple - D (duplicate it), move it to where the next one should go, and then keep going Apple - D and each new image will space itself evenly across the page.
It can be very useful doing this with lines if you are trying to draw a grid. It means the lines will be evenly spaced.

It is possible to paint in AppleWorks too. You can open a paint page from the opening dialogue window, or click on the Paint tool in the toolbox and draw a box to paint in. (Having a whole paint page is easier).
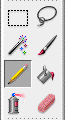
You have an extended toolbox in paint pages. The extra tools are the selection rectangle that lets you select a rectangular area, or the lasso that lets you select around any shaped object.
In the next line you have the magic wand (don't ask - experiment!), and then a paintbrush. Below that is a pencil and then a paintpot. The last line has a spraycan, and then an eraser to rub out mistakes.
To change the size of brush, pencil etc, double click on that tool in the toolbox to bring up a window with those choices. For example, here is the brush option window.
 ...........................................................
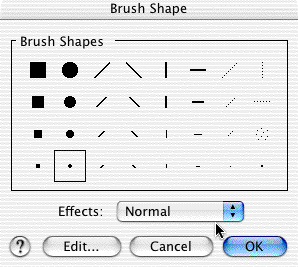
The one being used at the moment is in the box. You can also experiment with different effects. You can draw something on the paint page, and then select it with the lasso tool, copy it, and paste it into a wordprocessing page as decoration or illustration.
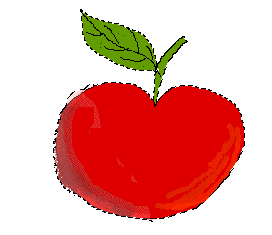
If you want to make the picture smaller, use the lasso tool to select it, and then go Transform - Scale by Percent to reduce the size. Once it is pasted in another document, you cannot change the size by squeezing in the corners - it must be resized in the paint environment, and only by using the lasso tool, not the rectangular selection tool. To use the lasso, just roughly go around the object like the apple below - when you have joined the curve up, it will just select the areas with colour.

9. Using the autogrid in drawing documents
When you are working in a drawing document, you can move objects around and line them up by dragging them. If you want to move them only tiny little amounts, it can be very frustrating. To get the ability to move objects in only tiny little bits, you need to go Options - Turn Autogrid Off.
Similarly, you can hide the graphics grid if you want to - it never prints, it is just there to help you line things up accurately. But you can go Options - Hide Graphics Grid if you prefer.